


Baking at high altitude sourdough bread presents its own challenges because of the low air pressure and dry conditions. However, with the right methods and adjustments, you can make delicious, crisp breads with an airy crumb even at high altitudes. In this comprehensive guide, we’ll explore what high altitude baking is like and provide a step-by-step process for preparing high altitude sourdough bread.
Understanding High Altitude Baking:
Baking at high altitude requires a number of adjustments to maintain low air pressure and humidity levels. At high altitudes, the low atmospheric pressure affects baking in many ways.
key factors in bread baking:
- Yeast Activity: Yeast behaves differently at high altitudes due to lower air pressure. It becomes more active and ferments faster, which can lead to over-proofing if not managed properly.
- Evaporation: With drier air at high altitudes, bread dough tends to lose moisture more quickly during fermentation and baking. This can result in dry or dense loaves if not addressed.
- Rising Time: Dough rises faster at high altitudes due to reduced air pressure. As a result, it’s crucial to monitor the proofing process closely to prevent over-proofing.
Adjustments for High Altitude Sourdough Bread:
To adapt your sourdough bread recipe for high altitudes, consider the following adjustments:
- Flour and Liquid Ratios: Increase the hydration level of your dough by adding slightly more water than usual. This helps counteract the faster evaporation rate at high altitudes and keeps the dough moist during fermentation.
- Yeast and Fermentation: Use less yeast or sourdough starter than you would at lower altitudes to slow down the fermentation process. This prevents the dough from over-proofing and maintains a balanced rise.
- Kneading and Dough Handling: Be gentle with your dough to avoid excessive degassing, which can lead to dense loaves. Use a light touch during shaping and shaping to preserve the air bubbles and structure.
- Baking Temperature and Time: Increase the baking temperature slightly to promote better oven spring and crust development. Keep a close eye on the bread while it bakes, as it may require less time in the oven due to faster evaporation.

Now, let’s dive into a high altitude sourdough bread recipe:
Adjusting Your Oven Temperature for High Altitude Baking
The problem with baking bread at high altitude is the oven temperature. I have often found that I need to either bake at a higher temperature or bake the bread for a longer period of time to get it to cook properly. Of these two options, I prefer the longer baking time. The extra time needed depends on the bread. It is more for pan breads than for most loaves.
Although raising the baking temperature does shorten the cooking time of a loaf of bread, it only lasts so long. If the temperature is too high, you will burn the outside of the loaf before the inside is fully cooked
Should I Bake Sourdough Bread With Convection?
If we can cook bread in a closed container, like a Dutch oven or combo cooker, you can use a fan when baking sourdough bread. When baking sourdough bread, the container traps the steam, even if the fan is running. Since convection should not be used for bread baked directly on the baking surface, the fan’s job is to blow air into the oven and circulate steam, I’ve found that cooking this way tends to dry out the dough prematurely.
If you are baking bread that does not require steaming, you can use convection, which is done either with a lid on or an egg wash, and does not require steaming in the oven, so using convection is the safest method. Note that when using convection, it is common to reduce the baking temperature or total baking time.
For example, you can bake a recipe at 350 Fahrenheit non-convection for 20 minutes at sea level. I would set my oven to bake at 350 Fahrenheit and then bake for 20 minutes.
Adjusting Dough Hydration at High Altitude
Related to the section above about baking temperatures, when I bake sourdough bread at high altitudes I often need to increase the baking time. As I mentioned earlier, changing the total bake time or baking temperature is not always the best option.
Bread and other foods take longer to cook when they reach a higher internal temperature. For a standard free-form loaf of bread, I need to bake for about 10 minutes, depending on the style of bread and the recipe. Breads with higher hydration take longer to cook completely, whether it’s white bread or whole wheat bread.
How Can I Tell When Bread is Done Baking at High Altitude?
For a free-form loaf, I would say the internal temperature should be somewhere around 200-204 Fahrenheit. However, I have found when baking bread that sometimes no matter how hard I cook it, it never reaches that temperature. You want to look for a crust that is crisp and well-colored all around. And the bread should also be light, depending on the type of bread, the internal temperature should be somewhere around 200-205 Fahrenheit, depending on the style of bread.
How Humidity Affects Dough Hydration at High Altitude
Sometimes, but not always, humidity is related to altitude. Humidity can affect your flour a lot. Here in New Mexico, there is a huge range of humidity levels, but generally, it is low, around 20 to 30%. I usually need to add more water to my recipes.
The important thing is to be aware of this and add water to your dough to compensate.
I try to give you some indication in my recipes with photos to help you understand if your dough is properly hydrated or not.
Let Your Dough Rest in Autolyse
Humidity is often higher at higher altitudes, though, so you may find it beneficial to mix your water and flour and let it rest for a while before adding your starter. Autolyzing, which involves mixing the water and flour only and letting it rest, is beneficial when baking sourdough bread at high altitudes, even if the rest is only a brief 15 to 20 minutes.
Reduce Leavening at High Altitude
However, humidity is often higher at higher altitudes, so you may find it beneficial to mix your water and flour and let it rest for a while before adding your starter. Autolyzing, which involves mixing the water and flour and letting it rest, is beneficial when baking sourdough bread at high altitude, even if the rest is only 15 to 20 minutes.
With sourdough bread and its long fermentation, there is generally no need to hydrate the recipe at all—it is a no-autolyse recipe, so baked goods like cookies will benefit from this rest time. A short autolyse is always an option when you are baking sourdough bread at high altitude.
How Does Altitude Affect My Sourdough Starter?
You may find that the fermentation time of your starter may increase significantly when moving to higher altitudes, but I haven’t found it to be a huge deal. Your normal refreshment cycle for your starter should be responsive, mixing it to its performance, and adjusting your refresh times and ratios as needed.
Let’s say, for example, if your starter is more acidic, you might mix less starter into your jar. I make adjustments like this in my kitchen constantly based on the weather and temperature – and I miss it even if I’m cooking on top of the ocean.
Are the Recipes at The Perfect Loaf Made for High Altitude?
I always try to bake sourdough bread on a high oven in my home kitchen, and the recipes posted here are tested under those conditions. But I do modify my recipes a little bit to work in a lower oven. As with all things baking bread, adjustments to your kitchen may be necessary, whether it be water or oven temperature, timeline, leavening, etc.
WHAT MAKES SOURDOUGH DIFFERENT FROM OTHER BREAD?
The key difference is this: most breads are yeast ferments, which are very readily available, very easy to activate. Sourdough bread, on the other hand, is a very traditional process. It’s yeast that comes from the wild in the environment through a fermentation “starter.” The yeast, the bacteria, create this beautiful bubbly soup, and the bubbles of carbon dioxide that help our dough rise. The level of sharpness in your sourdough depends on the acids produced by the environment.
Sourdough is usually fermented for a very long time—meaning, the dough rests a lot. Which helps develop flavor and texture.
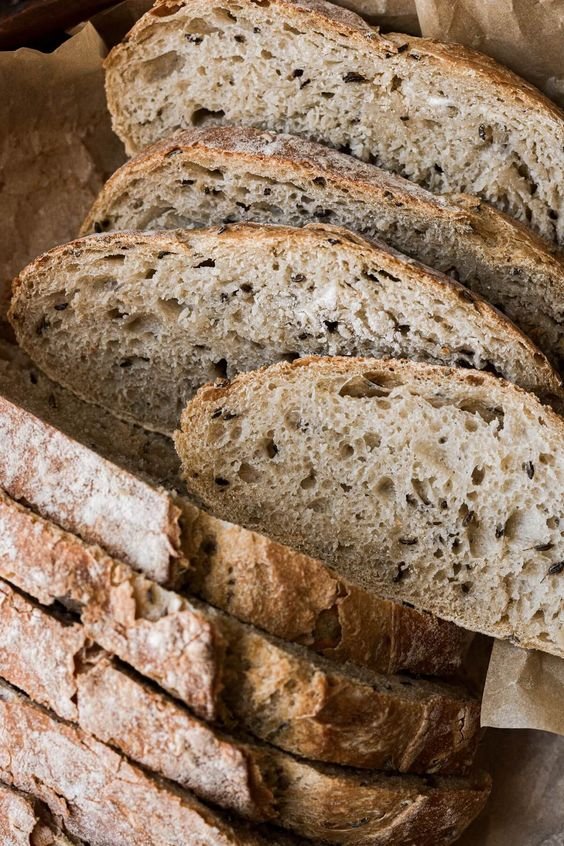
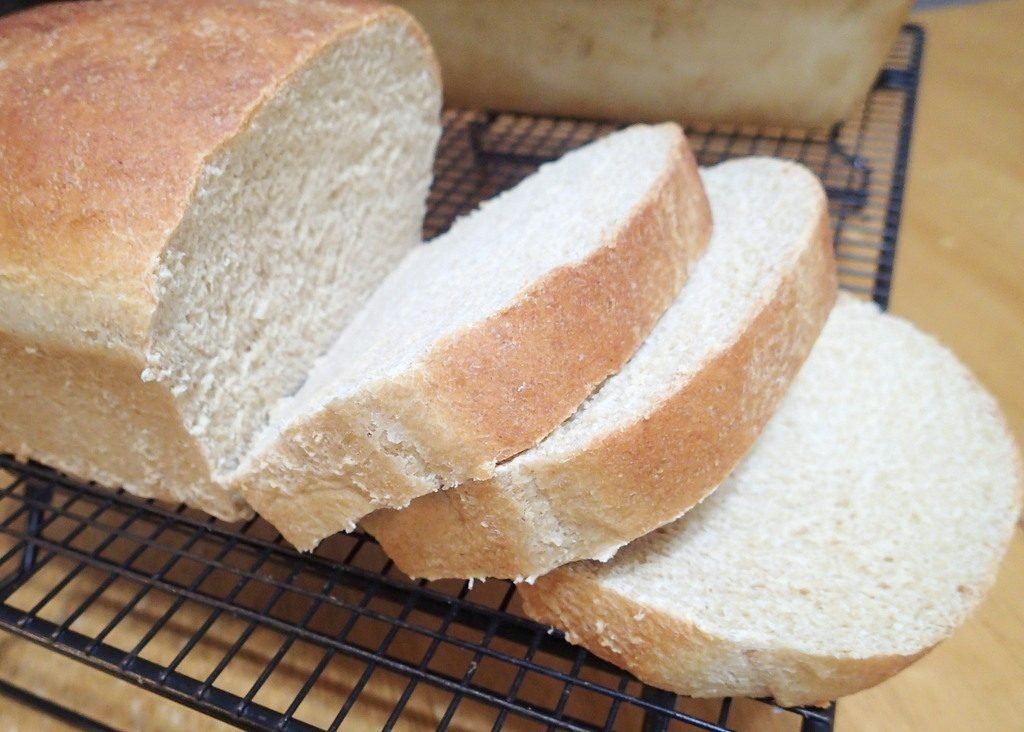
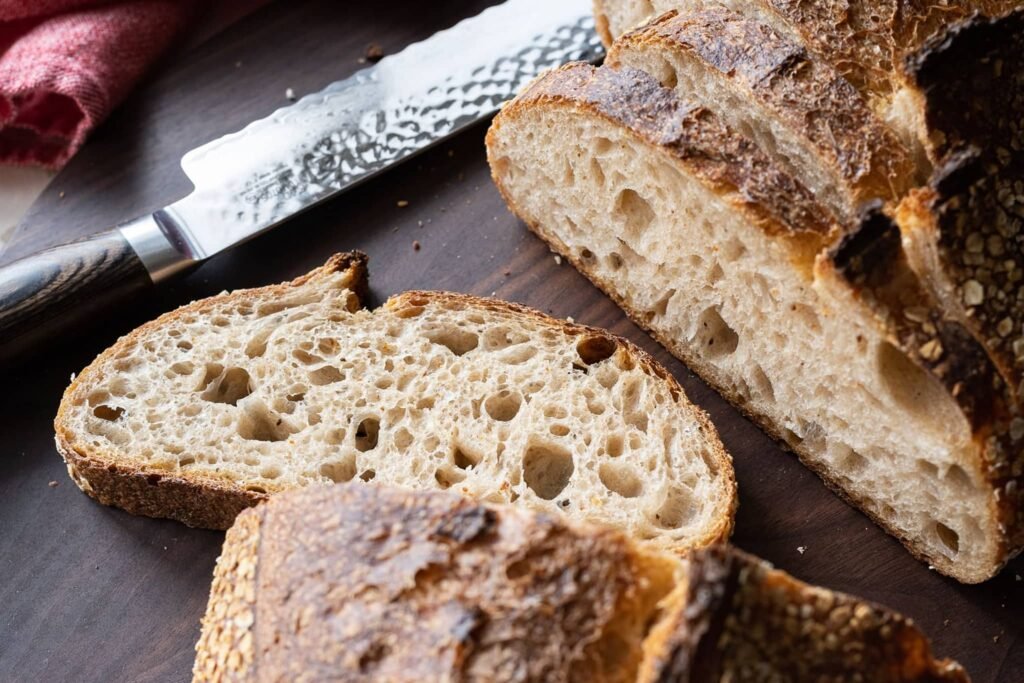
How to make High altitude sourdough bread recipe
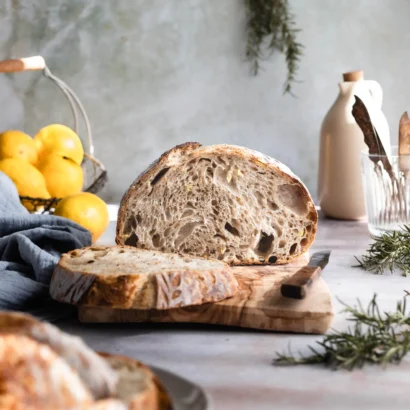
High altitude sourdough bread recipe
Ingredients
- 400g bread flour
- 100g whole wheat flour
- 350g water (adjust as needed for hydration)
- 100g active sourdough starter (100% hydration)
- 10g salt
Instructions
- Mixing and Autolyse:In a large mixing bowl, combine the bread flour, whole wheat flour, and water. Mix until all the flour is hydrated, but do not knead the dough.Cover the bowl with a kitchen towel and let it rest for 30 minutes to 1 hour. This autolyse period allows the flour to fully absorb the water and develop gluten naturally.
- Adding Starter and Salt:After the autolyse, add the active sourdough starter to the dough. Use your hands or a dough scraper to incorporate the starter evenly.Sprinkle the salt over the dough and continue mixing until it is fully integrated.
- Bulk Fermentation:Cover the bowl with plastic wrap or a damp towel and let the dough ferment at room temperature (ideally 70-75°F or 21-24°C) for 4-6 hours, or until it has doubled in size.During bulk fermentation, perform a series of stretch and folds every 30 minutes for the first 2 hours. This strengthens the dough and redistributes the yeast activity.
- Shaping:Once the dough has doubled in size, gently transfer it to a floured work surface. Divide the dough in half if making two loaves.Shape the dough into tight rounds or batards, being careful not to deflate the dough too much.
- Proofing:Place the shaped loaves in floured proofing baskets or bowls, seam side up.Cover the loaves with a kitchen towel or plastic wrap and let them proof at room temperature for 2-4 hours, or until they have visibly expanded and pass the finger dent test.
- Preparing the Oven:About 30 minutes before baking, preheat your oven to 450°F (232°C). Place a Dutch oven or baking stone on the middle rack to preheat along with the oven.
- Baking:Once the oven is preheated, carefully transfer one loaf to the preheated Dutch oven or onto the preheated baking stone.Score the top of the loaf with a sharp knife or razor blade to allow for expansion during baking.Cover the Dutch oven with its lid or create steam in the oven by spraying water with a spray bottle and quickly closing the oven door.Bake the loaf covered for 20-25 minutes, then remove the lid and continue baking for an additional 20-25 minutes, or until the crust is deep golden brown and the loaf sounds hollow when tapped on the bottom.Repeat the baking process with the second loaf if baking two loaves.
- Cooling and Enjoying:Once baked, transfer the loaves to a wire rack and let them cool completely before slicing. This allows the interior crumb to set properly.Slice and enjoy your freshly baked high altitude sourdough bread with butter, olive oil, or your favorite toppings.
Video
- Related Recipe:-
- Easy Gluten Free Pumpkin Pancake Recipe
- Sourdough sandwich bread recipe
- Sourdough discard pancakes recipe
Nutrients:-
- Serving: 1slice
- Calories: 157kcal
- Carbohydrates: 32g
- Iron: 1mg
- Calcium: 8mg
- Sugar: 1g
- Fiber: 1g
- Potassium: 53mg
- Sodium: 325mg
- Fat: 1g
- Protein: 5g
- Saturated Fat: 1g
Conclusion:
Baking sourdough bread at high altitudes requires patience, experimentation, and a deep understanding of the baking process. By making thoughtful adjustments to your recipe and techniques, you can overcome the challenges posed by lower air pressure and drier conditions. With practice and perseverance, you’ll master the art of high altitude sourdough baking and enjoy delicious homemade bread that reflects the unique flavors of your environment.
- What constitutes high altitude for baking purposes?
- High altitude generally refers to locations above 3,000 feet (about 900 meters) above sea level. However, adjustments may be needed even at lower elevations depending on local conditions.
- Why is baking sourdough bread challenging at high altitudes?
- High altitudes have lower air pressure and drier air, which affect the behavior of yeast, dough rising, and moisture retention during baking.
- How does high altitude affect sourdough fermentation?
- At high altitudes, sourdough ferments faster due to lower air pressure and increased yeast activity. This requires careful monitoring to prevent over-proofing.
- What adjustments should I make to my sourdough recipe for high altitude baking?
- Adjustments include increasing hydration, reducing yeast or starter amounts, and adapting proofing and baking times to account for faster fermentation and evaporation.
- What is the role of hydration in high altitude sourdough bread?
- Higher hydration levels help compensate for faster evaporation at high altitudes, keeping the dough moist and promoting better rise and texture.
- How can I tell if my sourdough bread is over-proofed at high altitudes?
- Over-proofed dough may become slack and lose its structure. It may also have a sour smell and fail to rise properly during baking.
- Why is scoring important in high altitude sourdough baking?
- Scoring allows the dough to expand properly during baking, preventing uneven rising and promoting a desirable oven spring.
- Should I adjust oven temperature for high altitude sourdough bread?
- Slight adjustments to oven temperature may be necessary for high altitude baking to ensure proper crust formation and oven spring.
- How can I prevent my high altitude sourdough bread from becoming too dense?
- Proper dough handling techniques, including gentle shaping and minimal degassing, help maintain air pockets in the dough, preventing density.
- What are some common pitfalls to avoid when baking sourdough bread at high altitudes?
- Common pitfalls include over-proofing, inadequate hydration, insufficient gluten development, and underbaking due to faster evaporation.
Pingback: Classic beignets recipe-How to make beignets
Pingback: Simple beef bourguignon recipe slow cooker no wine
Pingback: Vegan Banana Lassi-The Kitchen Decors recipe
Pingback: 4 ingredient slow cooker beef stroganoff
Thank you so much for this recipe